Hello, everyone! Fall is in the air here in Upstate NY, the changing leaves, the crisp nights, mums and pumpkins on front porches and the faint smell of a wood fire burning in the distance all get me excited for the season ahead! I’ve been harvesting from my garden for some time now and as the calendar turns to October, I get in the mood to start canning the fruits of my labor to enjoy until next fall.
I plant many things in the backyard garden, but one of my favorite things to grow…and eat…are peppers. I plant a bunch of varieties, probably too many if you talk to my wife, but hey, I enjoy it, right? One of my favorite peppers hands down are hot cherry. I was lucky enough to grow up with Polish, Italian and Lebanese ancestry, so my entire life has been enriched by all types of ethnic cooking; I learned the love and art of cooking at a young age watching parents, grandparents and the rest of my family members prepare food…..constantly. I think I knew how to make tomato sauce from garden picked tomatoes before I could ride a bike without training wheels; a bit of hyperbole, but not too far from the truth! So, with that little bit of history, I’d like to jump into to my first food entry ever and for our fall season.
As I picked hot cherry peppers the other day, I was waxing a little nostalgia and had this craving for a stuffed version that my family used to get together and make by the bushels. I asked Jenn if she would enjoy it if I called up my Mom and Dad and had them come over like the old days and whip up a batch with us…..she thought it was a great idea. Now, the crowd was much smaller than in years gone by and the bushels were only a mere 8 pounds, but make them we did; I was happy as can be. So for my first blog, I thought I would share the recipe and process, crafted by my grandfather, with all of you so you might enjoy these little treats as much as I do. So here we go!
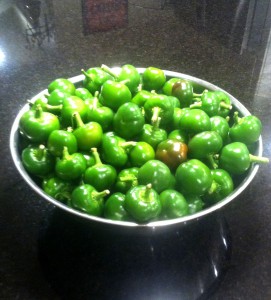
You need to start out with 8 pounds of hot or sweet cherry peppers; I happen to prefer the hot ones as they offer so much flavor and the heat mellows with the process. If you want to use less or more, not a problem, you’ll just need to adjust the stuffing mix to suit your needs. My motto is make tons….you’ll use it someplace!
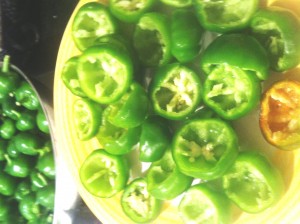
Core each pepper and wash out the seeds. I’ll tell you now, if you’ve never worked with hot peppers before, the peppers will create some stinging in the eyes and throat when you cut them, but this can be greatly reduced by opening a window and cutting the peppers on the counter and putting the stems/cores in a bowl next to you. Don’t throw them in the sink next to you while you are working! You can afterward, if you want to run them down the disposal, but not while you are coring! The “pepper fumes” will rise out of the sink and cause issues. Trust me on this one….I learned the hard way and Mom and Dad schooled me when we got together.
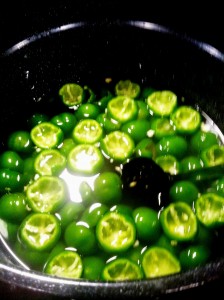
Once cored and rinsed, place the peppers in a large pot and cover with a brine mixture made from 1 gallon of water mixed with 1 cup of salt. If you need more to cover them, make more! The peppers will float…not to worry; just make sure they have some brine in the cores. Let them sit overnight on the counter. The remainder of the process is in the recipe below.
These peppers make great appetizers, served on a nice piece of hard crust, Italian bread, alone or dressed up with a sprinkle of Romano cheese and a slice of prosciutto ham!
Enjoy! If you have any questions, feel free to reach out to me. Until next time……
- On day two, it’s time to make the stuffing. Here is what gramps came up with:
- 1 tsp. black pepper
- 1 tsp. salt
- 2 tsp. oregano
- 4 cloves of garlic, chopped
- 2 tsp. parsley
- 4 tsp. of Romano cheese
- 8 oz. bottle of green olives with pimentos, chopped
- 1 large eggplant, peeled, cut into cubes, boiled 10-15 minutes until soft, drained.
- 1 ½ pounds of plain bread crumbs
- 2 oz. capers, chopped
- 2 oz. Anchovies, chopped. (You can omit if you’d like, but they add a very nice flavor when combined with everything else)
- Enough oil to moisten the mixture and bring together. I would say about 3 TBSP, but you’ll have to use your judgment. Add a little more if you need to.
- Oil to fill jar. Use your favorite oil. I prefer a blend that is made with 10% olive oil and 90% vegetable. The brand I use is Gem, packed and distributed by Sovena, USA right here in Central New York. Flavor is amazing. Hey...I've got to give a little plug to a local business!
- .
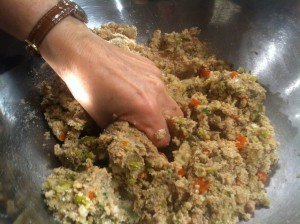
- Mix all of these ingredients together and you are ready to stuff!
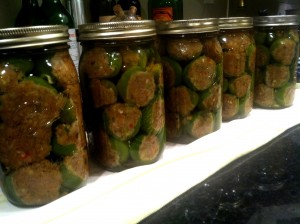
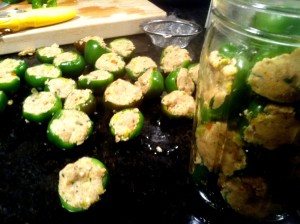
- Stuff each pepper and place inside a mason jar, making sure the stuffing side is touching the glass. You can put a few in the middle for stability, stuffing side up. Fill the jar up to the first ring in the neck.
- ****As a side note…make sure your jars and lids are sterilized and clean by either running through the dishwasher or boiling in a pot for 3 minutes or so. ****
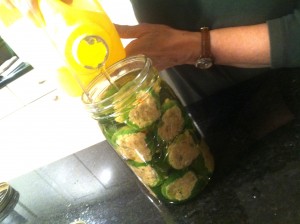
- Fill the jars with your favorite oil just enough to cover the peppers.
- Let the jars stand for about 10 minutes to let as much air escape as possible.
- Place your lids and rings on the jars and hand tighten.
- Put the jars in a stock pot or canning pot and cover with water and bring to a boil. Boil the jars for 30 minutes, remove from the water, and place on the counter to cool. Once cooled (at least 8 hours) check to make sure your lids are sealed….they cannot have any spring to them. If sealed, store in a cool dry place for up to a year or so and enjoy! If you have a lid that didn’t seal, change it and boil again. Once you open the jar, be sure to keep in the refrigerator.





Speak Your Mind